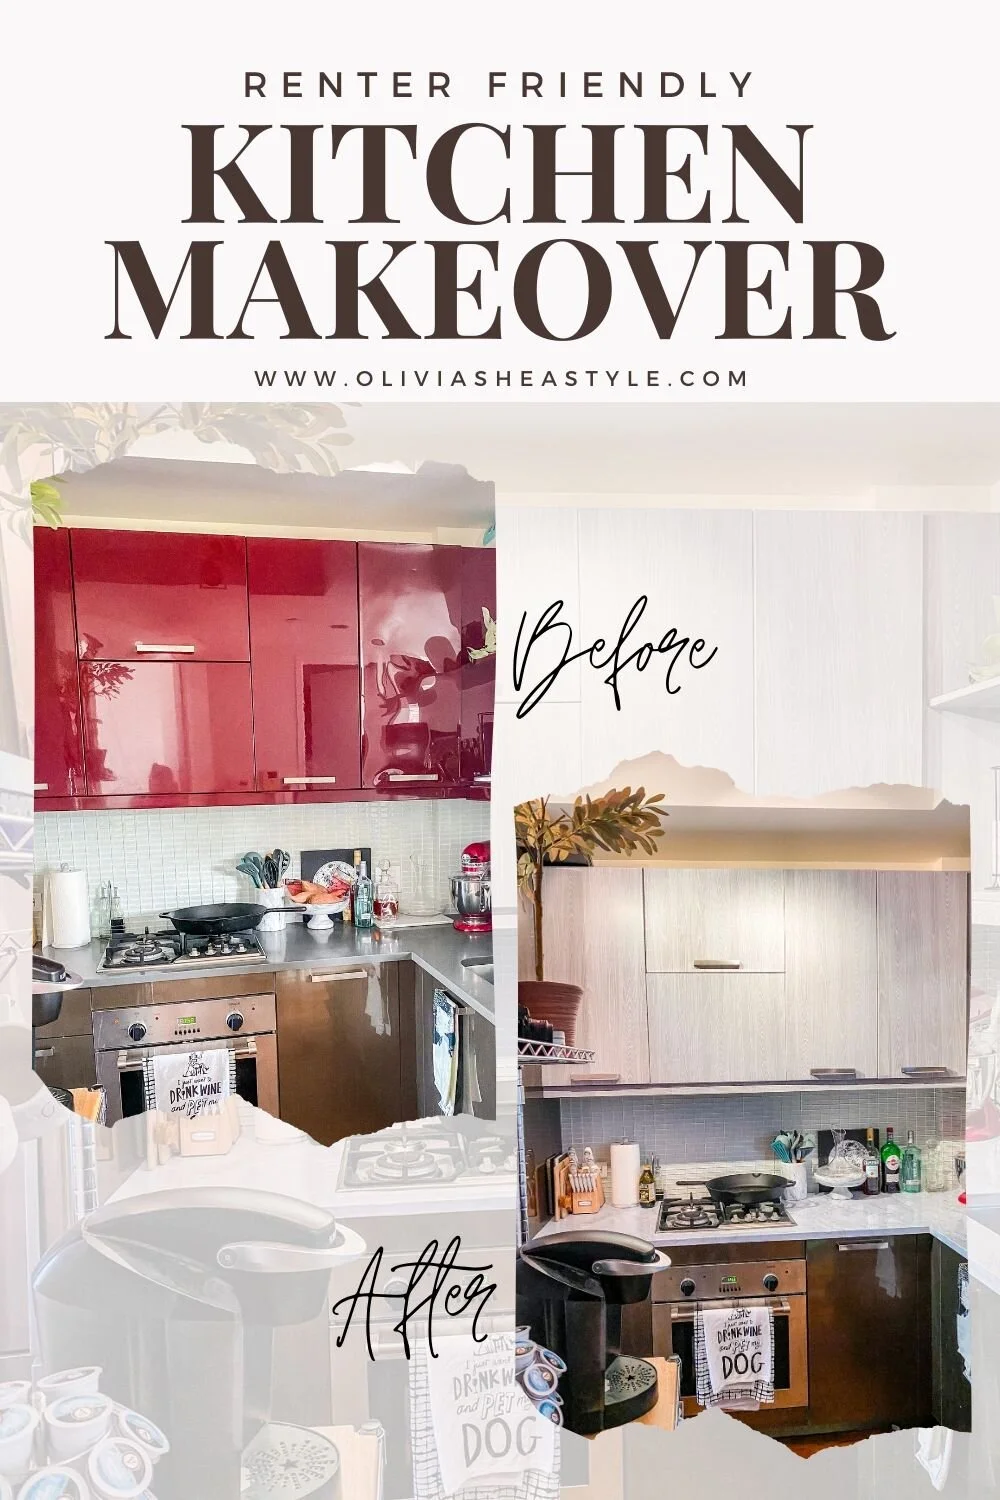
My Renter Friendly Kitchen Makeover


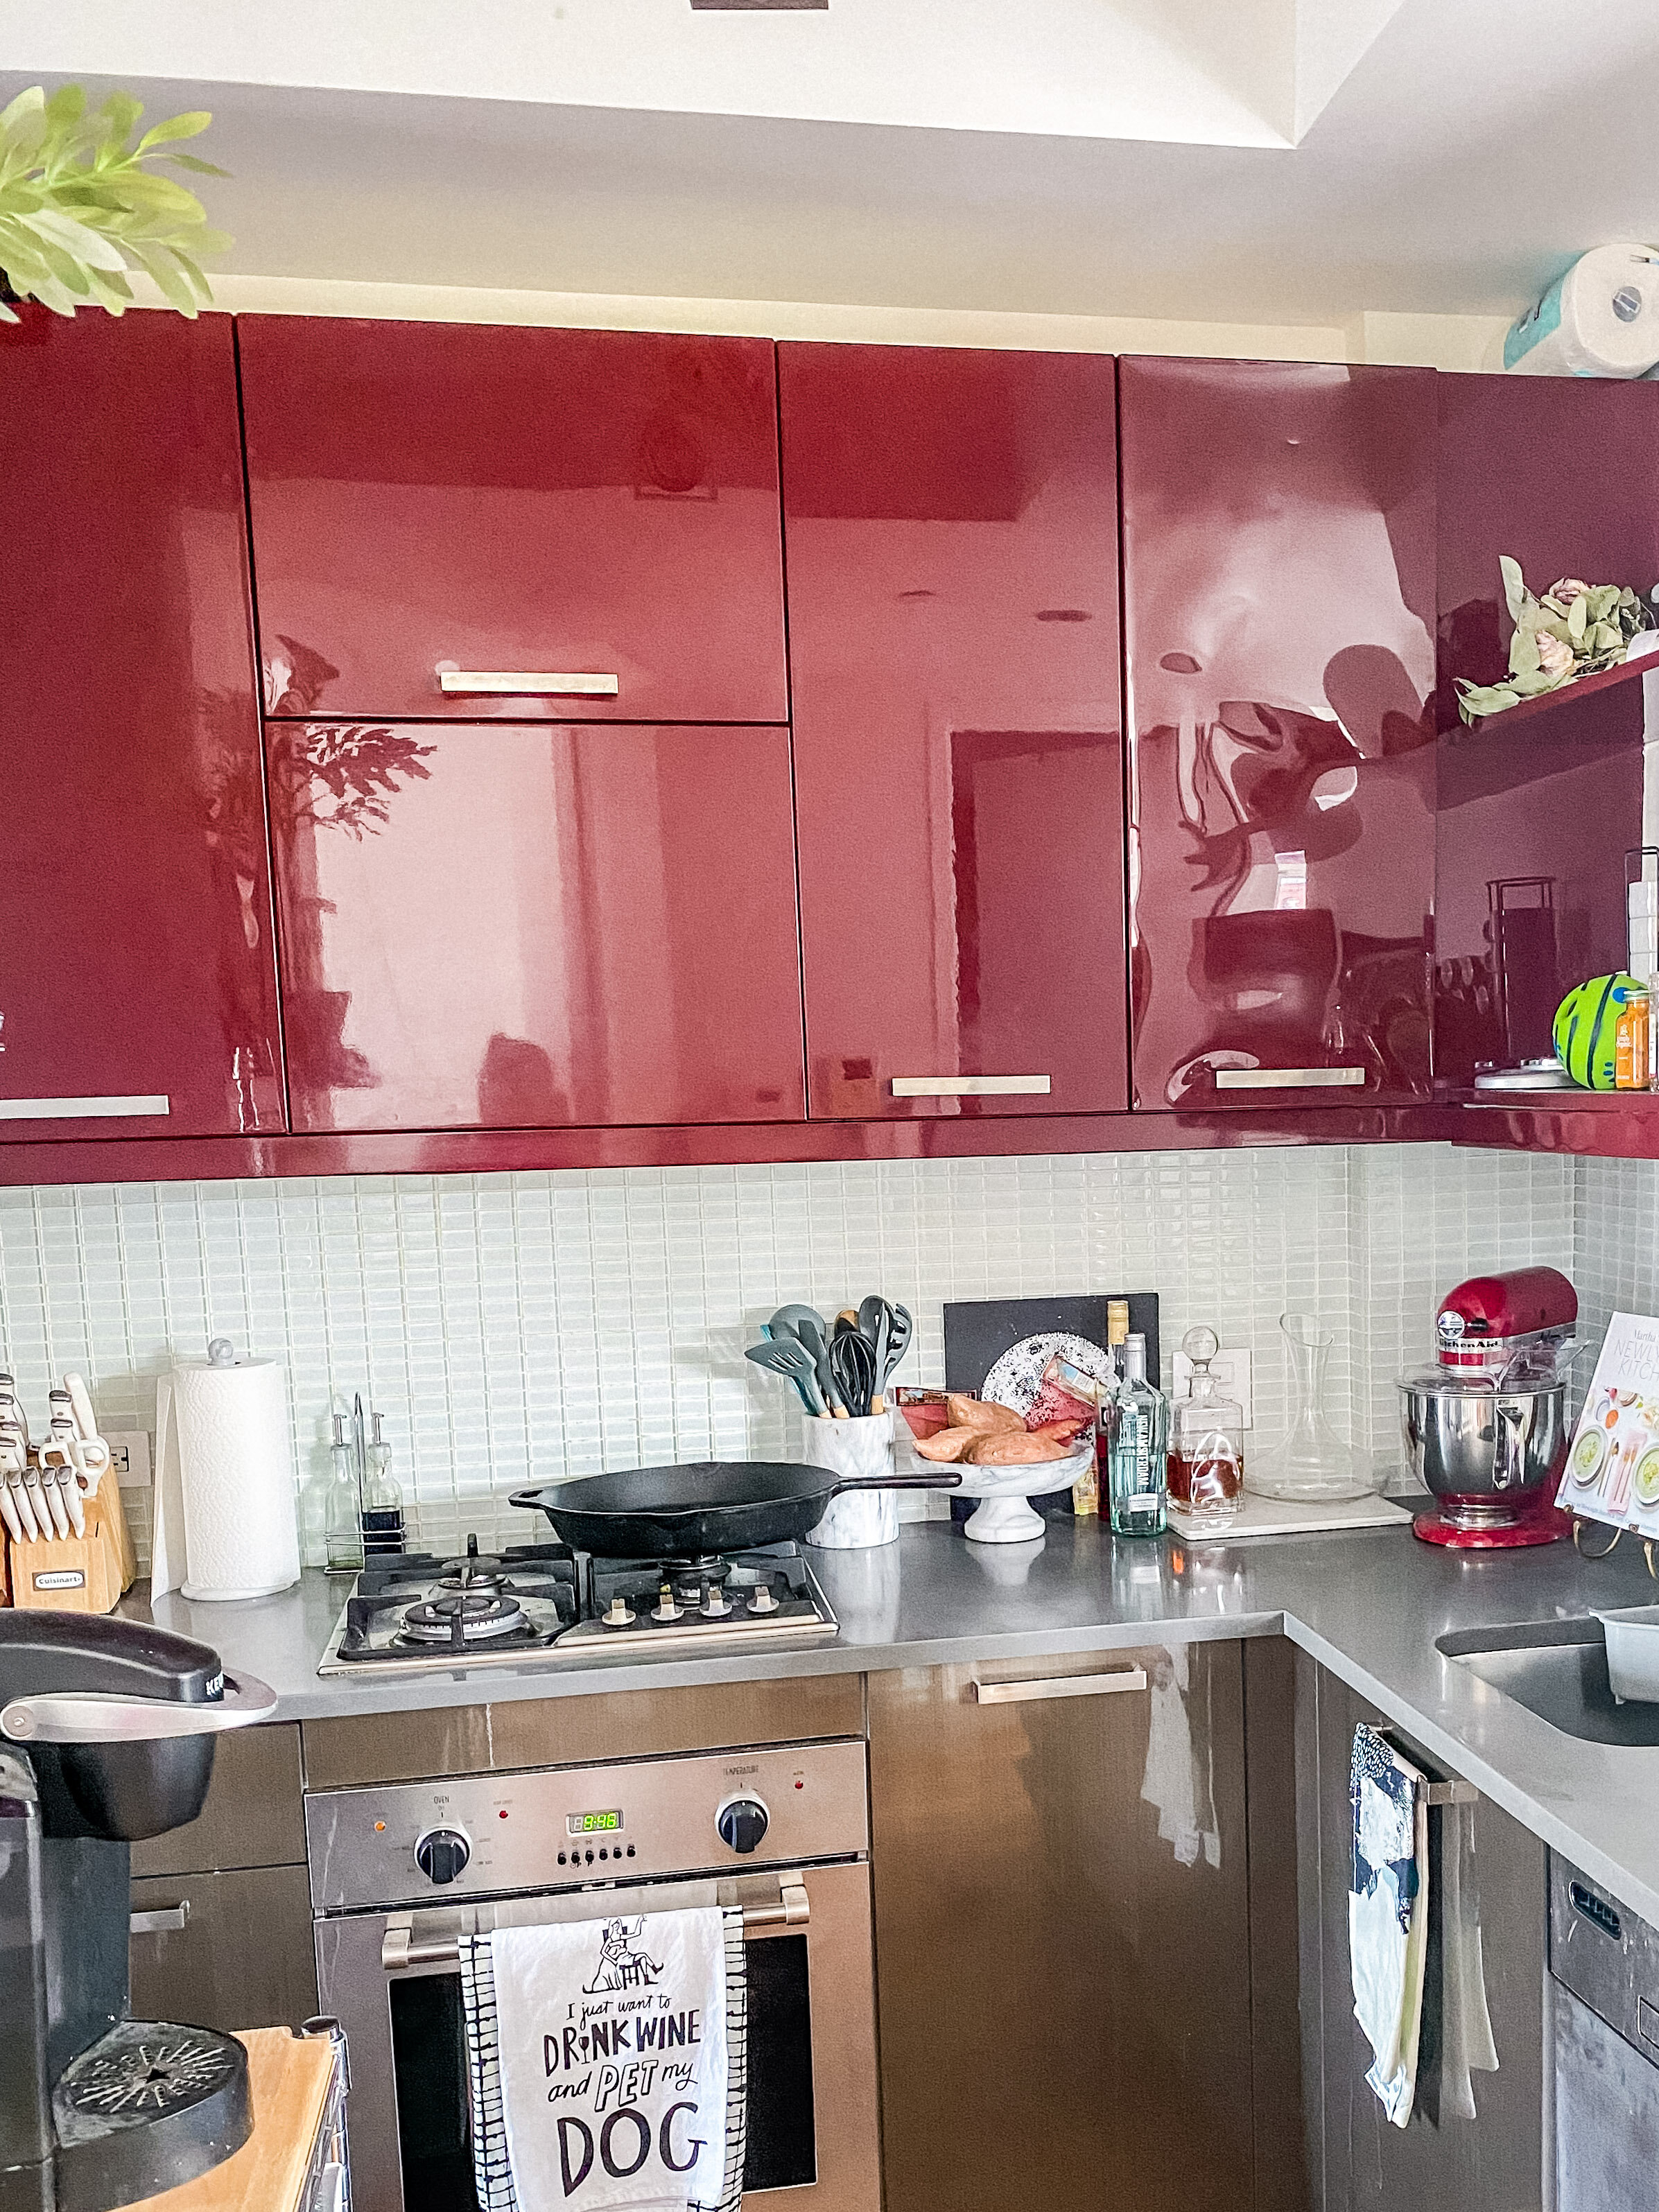
When we found our apartment, one of the first things that stood out to us were the bright red cabinets in the kitchen. I’m all for a fun design statement, but these cabinets just weren’t it for me. Originally, I had every intention of doing something about them right away, but they honestly did eventually kind of grow on me, and I started to like our quirky red kitchen. BUT, it wasn’t great in pictures, and when I finally felt like the rest of the apartment was finished it just felt like it didn’t go well with the rest of the decor in the apartment, so quarantine boredom got to me and I finally decided to bite the bullet and do a full, renter friendly kitchen makeover! And guess what? The whole renter friendly kitchen renovation came in at under $150!
When I first started thinking about what I wanted to do, my two priorities were low cost and damage free removal. Since this is only a rented apartment, I didn’t want to spend a ton because of course I know we’re not going to be here forever. I also wanted it to be easily removable because I of course know that we’ll most likely have to take it off when we leave. That being said, Jerry and I have talked about it, and we really love our apartment and our location. With the amount of time and work I’ve put into making this place “home”, we don’t plan on moving until we need more space for a family, meaning we’ll probably be spending at least 3-5 more years here, so we don’t mind investing a bit of money and time to make it perfect.
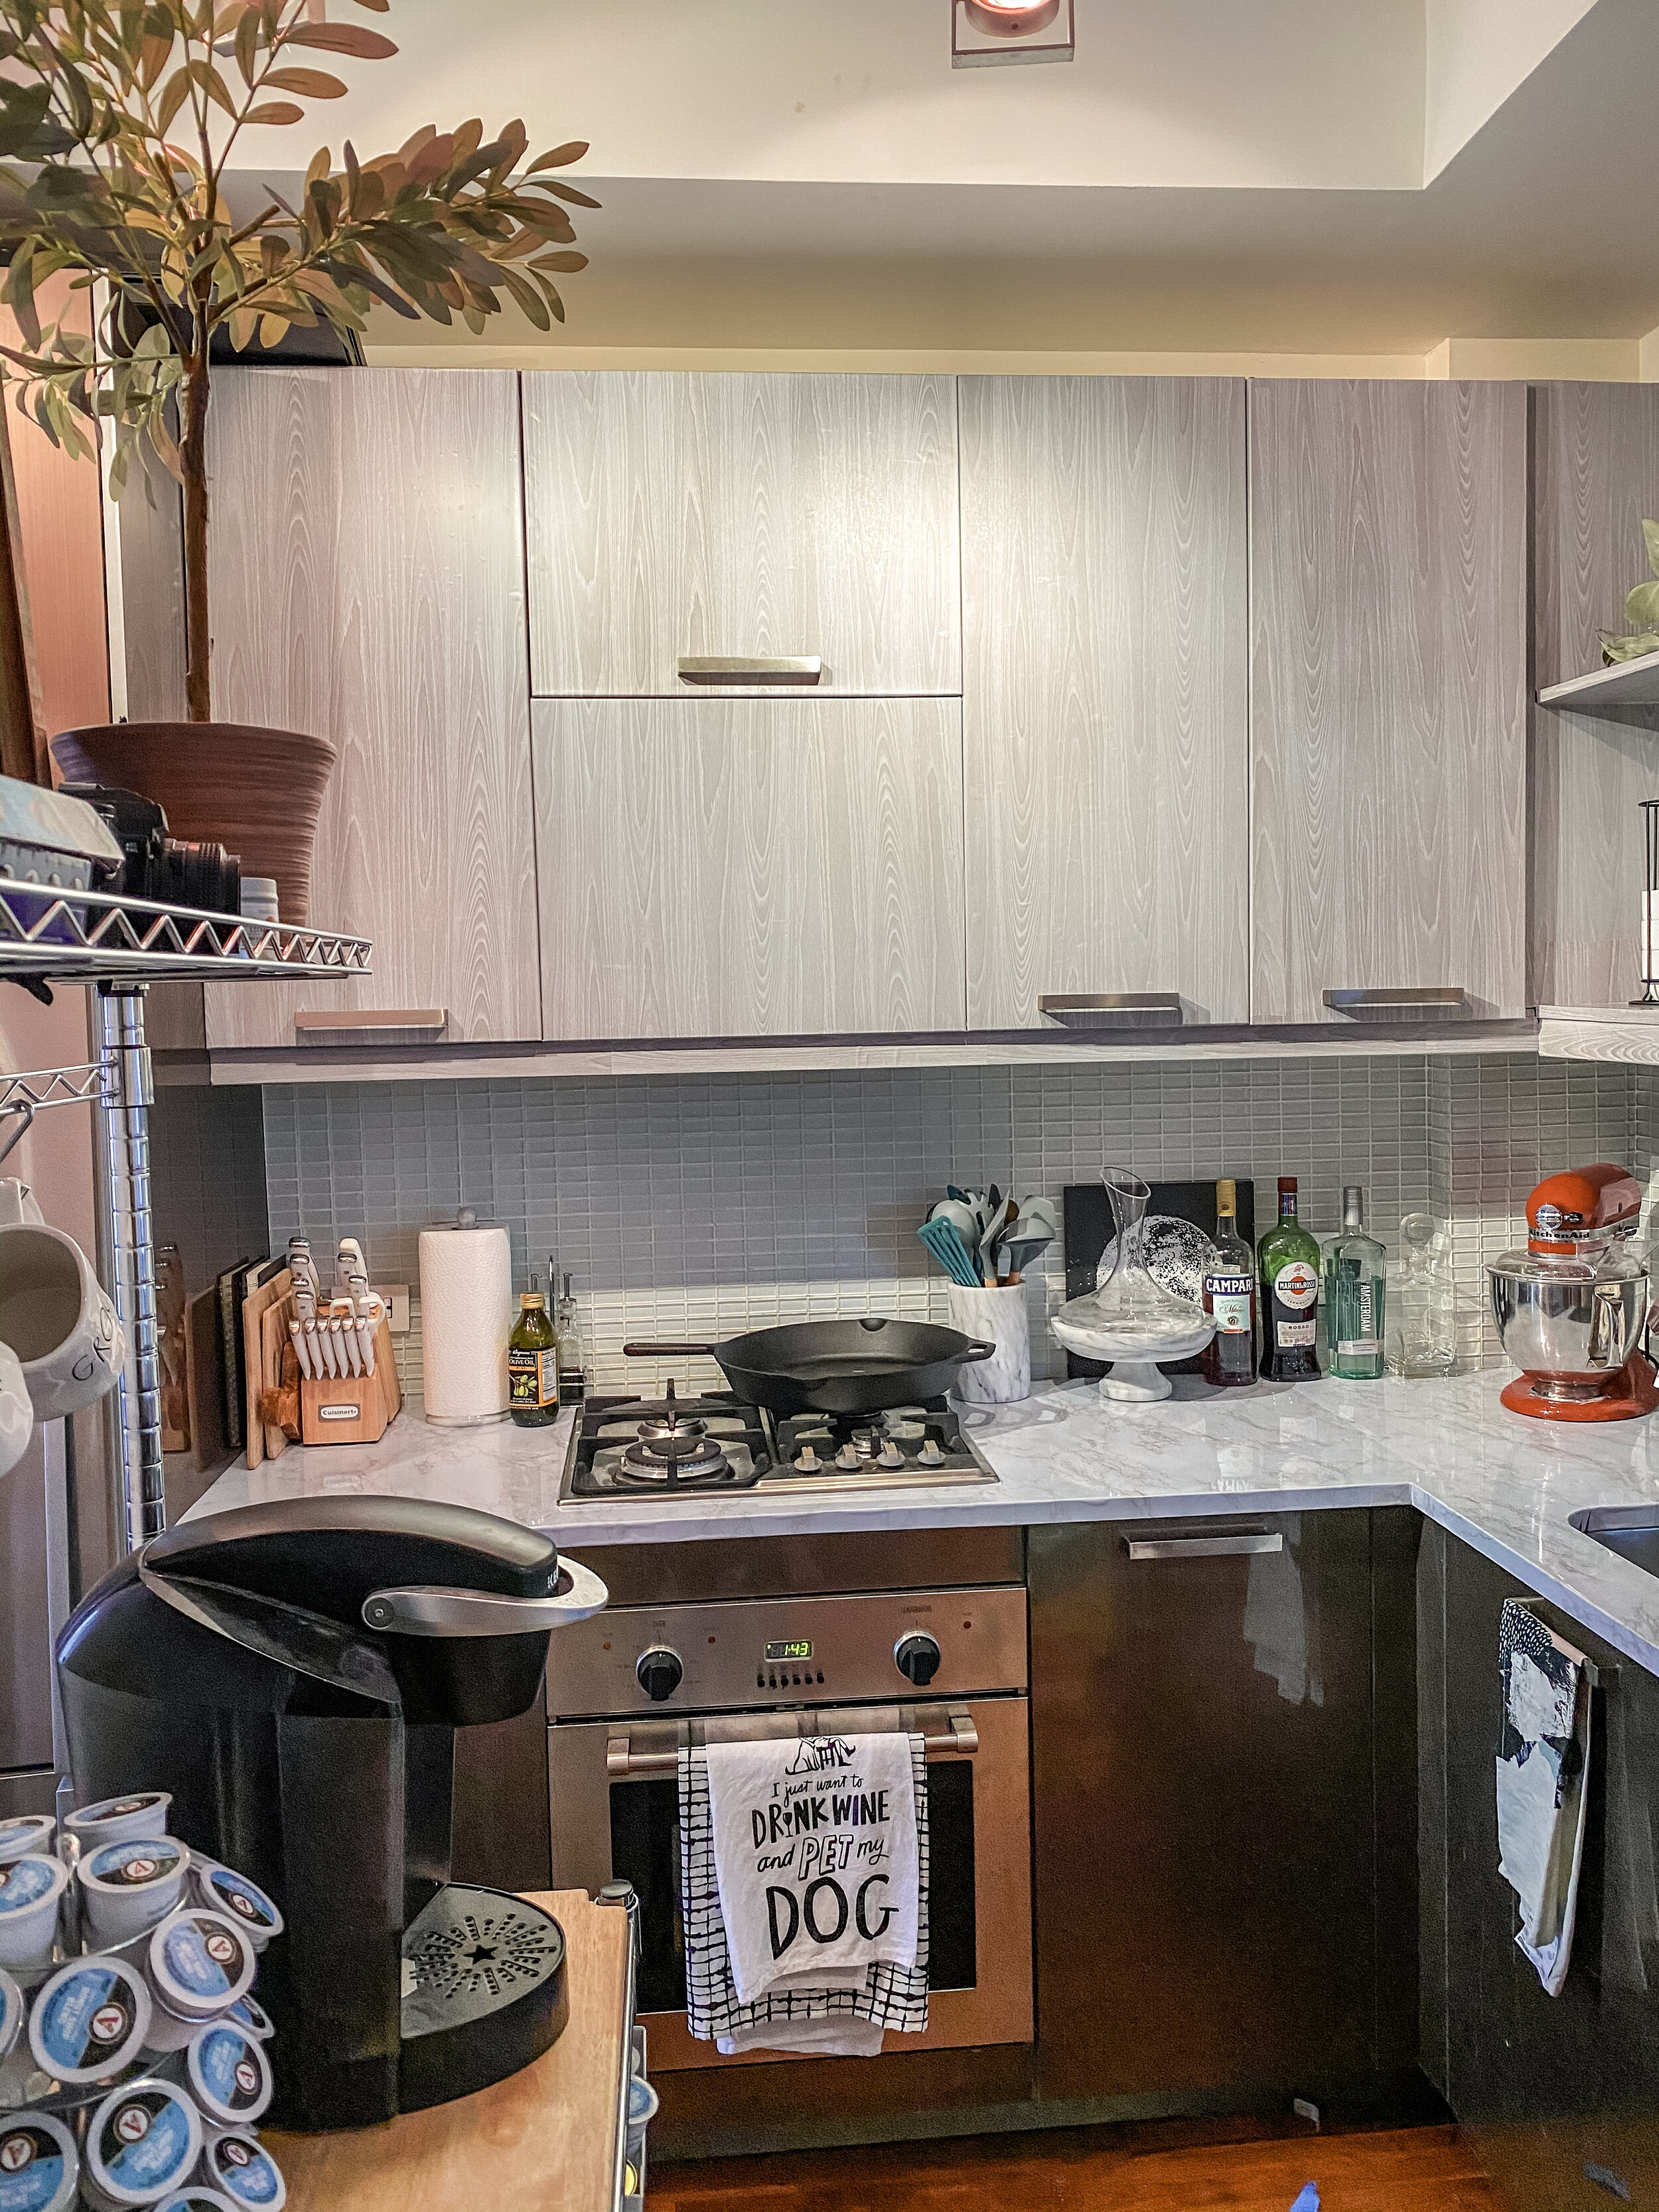
After spending some time browsing Pinterest and Instagram, I decided to give our kitchen a full facelift using contact paper! It was super affordable, and seemed simple enough. So I searched Amazon, Home Depot, Etsy, etc. for a contact paper that I thought would look good on the cabinets. Originally, I was going to leave the countertops alone and just do the cabinets, because I actually kind of liked the look of our gray countertops. But honestly, the counter wasn’t in the best shape. There were areas where the finish had somehow worn off, and small stains that were there when we moved in that no amount of scrubbing would get out, so I decided to do a marble countertop too, to give the kitchen a whole new look! Eventually, I may add a fun, patterned backsplash as well, but for now I’m happy with how it turned out.
Now that you know what led up to my kitchen makeover, let’s talk about the process! Surprisingly, I actually found the cabinets to be a little easier to do than the countertops. I think maybe because the wood grain pattern was a little bit more forgiving for one, and because they’re a simpler shape and you don’t have to work and cut around curves and edges like you do on the counters!
So, here’s what you’ll need:
Contact Paper (order an extra roll, just to be safe!)
Credit card/gift card to smooth out bubbles
Exacto knife/box cutter
Scissors
Windex
Paper towels
Caulk (I used clear)
Now for the process:
Note: For a video explanation, check out my Kitchen Makeover Instagram Story Highlight!

For countertops:
Move everything so there is absolutely nothing on your counter. If you have a gas stove, take the grates off of the stove, too.
Clean countertops and stove thoroughly. You’re not going to be putting contact paper on your stove, obviously, but if the paper accidentally does land sticky side down on your stove you want it to be clean because the last thing you want is to get crumbs stuck to it.
Measure your contact paper. You want to measure it so it slightly goes up on the sides. Once you stick it on you’ll use your exacto knife to cut the edge so that it is perfectly flush with your wall/backsplash.
Once your contact paper is measured, spray the section that you’re going to be sticking it to with Windex, and wipe with a paper towel so that it’s not soaking wet, but not completely dry, either. Having a little bit of wetness from the windex will help keep it from sticking before you’re ready for it to.
Peel off about an inch of the backing and place the contact paper down where you want it to go. I peel off the first inch, stick that down and then grab the backing of the contact paper with one hand. I let the paper rest over the hand that’s holding the backing.
Slowly pull the backing, and as you pull the backing slide your credit card along the paper towards your hand that is pulling the backing, pushing out any bubbles as you go.
When you get to the edge of your counter, fold the paper over the edge and make sure that you fold it carefully to avoid bubbles.
Once your entire countertop is covered, use caulk to seal the edges. This is especially important around the sink in order to prevent water from getting in and causing the paper to lift. This will also help to make your edges look cleaner. *heads up, you will also need to order a caulking gun if you don’t have one! I didn’t realize this and it made it much harder than it needed to be!

For Cabinets:
Use a screwdriver to remove the cabinet from the hinges, and remove all of the hardware on the cabinet.
Clean the cabinet thoroughly just as you did for the countertops.
Measure your contact paper. You want to be able to fully wrap it around the edges so that the contact paper covers at least an inch on the back. This will help it stay better and prevent opening and closing the cabinets from loosening the paper and causing it to lift. When I did my first cabinet I didn’t wrap it around all the way to the back, and it kept rubbing whenever I would open and close the cabinet, so I had to take it off and add more in order to make sure that it opened and closed smoothly.
Follow the same steps you followed to place the paper on the countertops and place it on the cabinets.
Use your screw driver or exacto knife to poke holes in the contact paper where the hardware holes are.
While the cabinets are still off, cover the frame of the cabinets on the wall with contact paper.
Screw hardware back onto cabinets, and screw cabinets back onto the frame.
I didn’t add caulking to the cabinets, because unlike the countertops they’re a lot less likely to be exposed to water, but I am keeping the caulk on hand in case I eventually decide I need to.
Pro tip: Order an extra roll of any contact papers you used in case you need to do touch ups down the road! If you have to order more later, it may come from a different production batch, so the colors/patterns may be slightly different!

Frequently Asked Questions:
Q: Is it easy/clean to remove?
A: Yes and no! It will remove cleanly and the surface will look exactly the same as it looked before. BUT, it will definitely not come off in one piece so it might be kind of a pain to do, and when you remove it the paper is going to rip and be ruined.
Q: What is the contact paper removal process?
A: I haven’t actually removed it yet, so I’m not entirely sure, but I’m guessing that first you use a butter knife to remove any of the caulking around the edges, and then you just peel it off!
Q: Did you get stick on backsplash?
A: I ended up holding off on the backsplash to see what the kitchen would look like after doing the counters/cabinets, but I definitely still might eventually. Since this is a temporary kitchen, I definitely plan on going with a fun, statement backsplash if I do eventually do a backsplash, since I feel like I’d be scared to do that in my permanent kitchen someday because I know when it’s permanent I’ll want something classic that will age well. Here are some of the backsplash options I’m considering:
Q: Is the countertop contact paper waterproof, or do you have to be careful?
A: It’s vinyl, so it should be pretty waterproof, but I definitely would still be careful around the edges or anywhere where there is a seam. I’ve heard the caulking will definitely help with that. I’d also be careful with heat… I don’t plan on putting a hot pan or anything like that directly on the counter because I don’t want to burn it!
Q: What big mistakes have you made that we can avoid when using contact paper?
A: At first I didn’t order enough, so I had a half finished counter for like 3 days. So definitely order more than you think you’ll need, because you’re better off having too much vs not enough. It’s also helpful to have extra so that you can be pickier when it comes to lining up the pattern/edges. Also, definitely take your time. And start with an area that’s not too central, because you will make mistakes. If you have an area that’s usually covered by appliances, or a knife block, start there so your initial mess ups will be less noticeable! And like I said with the cabinets, make sure that you wrap the paper around the edges in order to avoid it rubbing and peeling as you open and close the cabinets!

Overall, it was definitely kind of an undertaking, and if you look closely it is absolutely not perfect. There are places where you can see seams and bubbles, especially in certain lightings. But I love the way it looks, and it seriously feels like I have a brand new kitchen! I would highly recommend this is you’re wanting to change the look of your kitchen in a rental, or even if you own your home and want the look of a new kitchen without dropping thousands on new countertops or cabinets!
Have you done any fun home projects while we’ve been staying in? I’d love to hear about them! Also, if you try this at home make sure to tag me in your pictures/stories on Instagram so I can see them & share them!
XOXO,
Olivia
PS. Want to see more of our apartment? Check out my full bedroom tour here!
PPS. If you want to come back to this post later, make sure to save it to your Pinterest home board!